Stepping into the world of photography can be both exciting and overwhelming. With countless cameras, lenses, and accessories available, it's easy to fall into the trap of thinking you need the most expensive gear to take great photos. The truth is much simpler: photography is about vision, creativity, and understanding the fundamentals—not about having the fanciest equipment.
In this guide, we'll explore what camera equipment is truly essential for beginners, what you can add as you develop your skills, and what expensive items you can safely skip until much later in your photography journey.
The Essential Starter Kit
These core items form the foundation of your photography gear. If you're just starting out, focus on acquiring these fundamentals before anything else:
1. A Decent Camera: DSLR or Mirrorless
Your first major decision is choosing between a DSLR or mirrorless camera. Both can produce excellent images, but they offer different experiences:
- Optical viewfinder shows direct view through lens
- Generally better battery life
- More mature lens ecosystems
- Often more affordable used options
- Electronic viewfinder shows exposure preview
- Generally smaller and lighter
- Silent shooting options
- Often better video capabilities
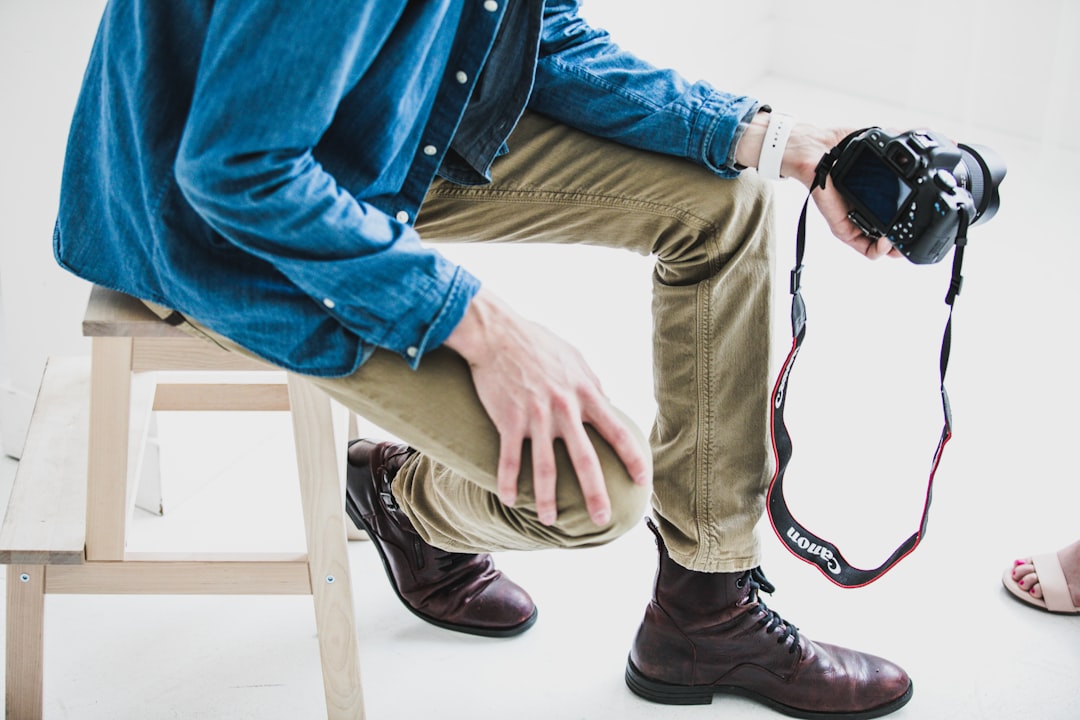
Recommendation: As a beginner, consider entry-level to mid-range options like the Canon EOS Rebel series, Nikon D3500/D5600, Sony a6000 series, or Fujifilm X-T200. These cameras offer excellent image quality while remaining accessible.
Budget option: Don't overlook the used market. A 2-3 year old camera model can offer significant savings while still providing all the features you need to learn.

Entry-level cameras like these provide everything you need to start your photography journey.
2. Your First Lens: Versatility is Key
Most beginner cameras come with a "kit lens" (typically an 18-55mm zoom for crop sensors). While kit lenses are often maligned by photography snobs, they're actually quite versatile for beginners:
- They cover wide-angle to short telephoto range
- Allow you to experiment with different types of photography
- Are lightweight and easy to carry
Recommendation: Start with your kit lens, but as your first lens purchase, consider a 50mm f/1.8 (often called a "nifty fifty"). These lenses typically cost $125-200 new, offer excellent image quality, and introduce you to the creative possibilities of a wide aperture.
3. Memory Cards: Don't Skimp
Memory cards are the digital equivalent of film—they store your precious images until you can transfer them to more permanent storage.
Recommendation: Purchase at least two memory cards from reputable brands (SanDisk, Lexar, Sony, etc.). For most beginners, 32GB or 64GB cards offer a good balance of capacity and price. Ensure the card's speed class matches your camera's capabilities.
4. Batteries and Charger
Running out of power in the middle of a shoot is frustrating and preventable.
Recommendation: Always have at least one spare battery. Official manufacturer batteries offer the best reliability, but high-quality third-party options can provide significant savings.
5. A Sturdy Camera Bag
Protect your investment with a bag that shields your equipment from bumps, moisture, and dust.
Recommendation: Choose a bag that fits your current gear with a little room to grow. Consider how you'll use it—shoulder bags offer quick access but can be uncomfortable for long periods, while backpacks distribute weight more evenly but require more effort to access gear.
Valuable Additions as You Progress
Once you've mastered the basics with your starter kit, these items can meaningfully expand your capabilities:
1. Tripod: Stability for Creative Flexibility
A tripod is often the first accessory beginners should add. It enables:
- Sharp low-light and night photography
- Long exposure techniques (light trails, smooth water, etc.)
- Self-portraits and group shots with you in them
- More precise composition
Recommendation: The tripod market follows the adage "good, cheap, lightweight—pick two." For beginners, brands like Manfrotto, Benro, and MeFOTO offer reasonable quality at accessible prices. Look for:
- Aluminum construction (carbon fiber is nice but expensive)
- Weight capacity at least 1.5 times your heaviest camera+lens combo
- Adjustable leg angles for uneven terrain
2. External Flash: Controlling Light
The pop-up flash on most cameras produces harsh, unflattering light. An external flash (speedlight) opens up new lighting possibilities:
- Can be aimed at walls/ceilings to bounce light for softer illumination
- More power for larger spaces or outdoor fill flash
- Can be used off-camera for creative lighting setups
Recommendation: Start with a basic TTL (Through The Lens) flash compatible with your camera system. Godox and Yongnuo offer budget-friendly options that perform well.

An external flash with the ability to bounce light creates much more flattering illumination than built-in flashes.
3. Additional Lenses: Expanding Your Creative Range
As you discover your photographic interests, additional lenses can help you specialize:
For Portrait Photography
- 85mm f/1.8 prime lens: Perfect portrait focal length with beautiful background blur
For Landscape Photography
- Wide-angle zoom (10-20mm range for crop sensors): Captures expansive scenes
For Wildlife/Sports Photography
- Telephoto zoom (70-300mm is a good starting point): Brings distant subjects closer
Recommendation: Add lenses gradually as your skills and interests develop. Before purchasing, consider renting lenses for a weekend to ensure they meet your needs.
4. Filters: Practical Problem Solvers
Certain filters solve specific photographic challenges and can't be easily replicated in post-processing:
- Circular Polarizer: Reduces reflections and enhances colors, especially useful for landscapes
- Neutral Density (ND) Filter: Reduces light entering the lens, allowing for long exposures or wide apertures in bright conditions
Recommendation: Start with a circular polarizer in a size that fits your most frequently used lens. Consider step-up rings to use the same filters on different lenses.
5. Basic Editing Software
Even the best photographs often benefit from some basic editing:
- Adjusting exposure, contrast, and color balance
- Cropping for better composition
- Minor retouching and spot removal
Recommendation: Before investing in subscription-based software like Adobe Lightroom, explore free or one-time purchase options like:
- GIMP (free, open-source)
- RawTherapee (free, open-source)
- Affinity Photo (one-time purchase)
- Capture One Express (free versions available for some camera brands)
Expensive Equipment You Can Skip (For Now)
Marketing might make you feel like you need these items immediately, but they're rarely essential for beginners:
1. Full-Frame Camera
While full-frame cameras offer advantages in low-light performance and shallow depth of field, they're significantly more expensive—both the bodies and compatible lenses.
Why you can wait: Modern crop-sensor cameras produce excellent image quality that easily meets the needs of beginners and enthusiasts. The limitations of crop sensors rarely impact beginners, and the money saved can be better invested in education and quality lenses.
2. Professional-Grade Lenses
Pro lenses with wide apertures throughout their zoom range (f/2.8) or extremely wide prime apertures (f/1.2, f/1.4) can cost thousands of dollars.
Why you can wait: The technical advantages of professional lenses are often subtle and most beneficial in challenging conditions or for specific professional requirements. Learning to work within the limitations of consumer lenses actually builds valuable skills.
3. Advanced Lighting Equipment
Multiple studio strobes, light modifiers, and complex triggering systems are overkill for beginners.
Why you can wait: Start with understanding natural light and perhaps a single speedlight. Master the fundamentals of lighting before investing in complex setups.
4. Specialized Accessories
Items like macro rails, tilt-shift lenses, and high-end gimbals serve very specific purposes.
Why you can wait: These items only make sense when you've identified a specific photographic niche you're passionate about and have mastered the fundamentals in that area.
Investing in Knowledge vs. Equipment
The most valuable investment any beginning photographer can make isn't in equipment—it's in education:
- Books and online courses that teach photographic principles and creative vision
- Workshops and photo walks that provide hands-on guidance
- Time spent practicing and analyzing your results
A photographer with basic equipment and strong skills will consistently outperform someone with expensive gear but limited understanding of photographic principles.
The Upgrade Path: When to Invest More
How do you know when it's truly time to upgrade your equipment? Consider these signals:
- You consistently bump against specific technical limitations of your current gear
- You can articulate exactly what improvement the new equipment will provide
- The limitation is in the equipment, not in your technique or knowledge
- The upgrade addresses a need in the type of photography you're most passionate about
Conclusion: Focus on Creating, Not Collecting
Remember that the purpose of camera equipment is to help you create images that express your unique vision. The best approach for beginners is to start with the essentials, develop your skills, and let your experience guide future purchases.
Some of history's most iconic photographs were taken with equipment that would be considered primitive by today's standards. It's the photographer, not the camera, that makes a great image.
Start simple, learn deeply, and add equipment thoughtfully as your skills and specific needs evolve. This approach will serve both your photography and your budget better than chasing the latest gear.